
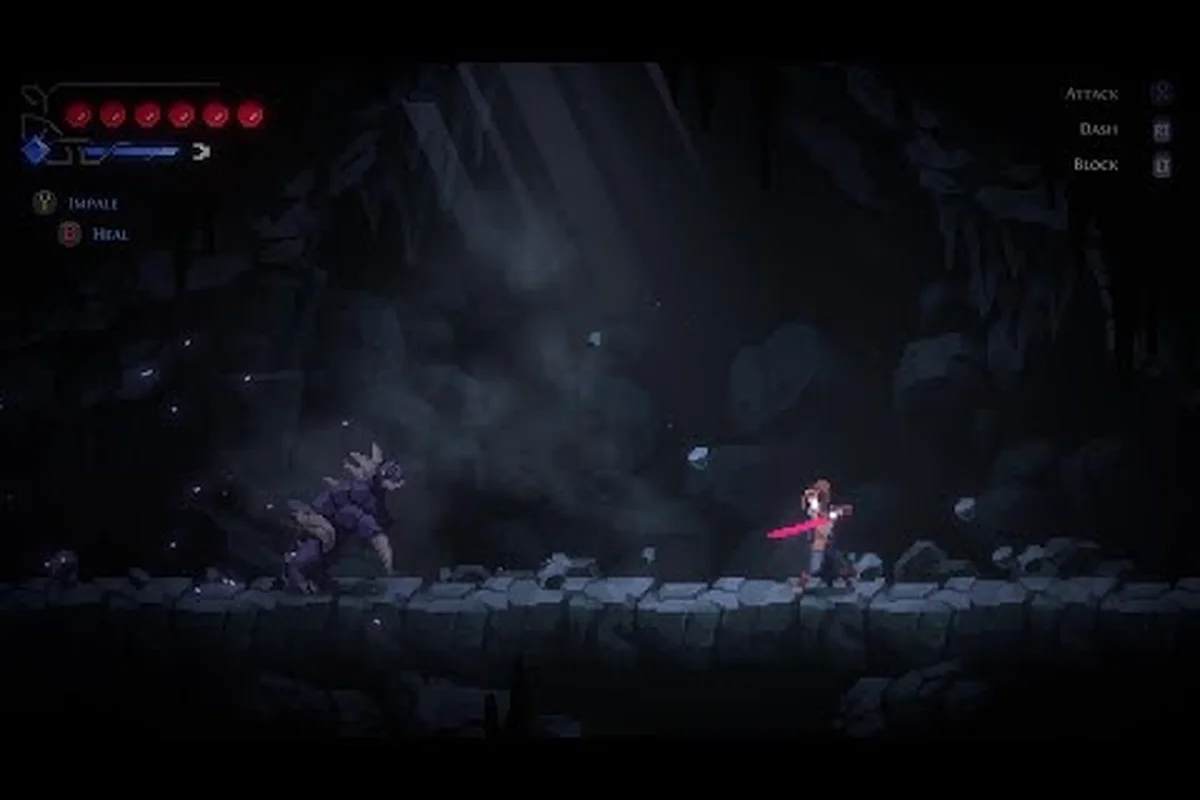
Learning Divinum how to heal is the single most important survival skill in the 0.39.1 demo, because the game offers no passive regeneration and your health pool shrinks fast against the Invader forces. Understanding the healing system, mana economy, and progression loop determines whether you clear the prologue or restart at the last checkpoint. This Divinum new player guide covers every recovery method, leveling route, and skill unlock path currently available, so you can enter the full August 28, 2026 launch with confidence.
The healing system in Divinum is intentionally restrictive, which means you need to plan around limited resources rather than brute-forcing encounters. Unlike many action games that hand out potions like candy, Divinum forces you to earn every recovery option through exploration and smart build choices. The demo version 0.39.1, which the developers updated for Steam Next Fest with an extended story prologue, gives you access to the core healing tools that will carry into the full release. By mastering these systems now, you build muscle memory that pays off immediately when the full game drops.
Divinum Healing Basics: Every Recovery Method Explained
Mana Shard Efficiency: Converting Recovery Into Damage
Mana shards restore 25% of your total resource pool per pickup, but they share spawn tables with Life shards—each crate can only contain one type. In the demo's combat slice, enemies drop Mana shards 30% more often than Life shards, meaning aggressive spellcasters sustain themselves better than melee builds. The Impale skill costs 15 Mana and deals 120% weapon damage, so a single Mana shard funds roughly 1.6 casts. When low on health, consider spending Mana on a defensive Rune activation instead of saving it for offense; the damage mitigation often prevents more HP loss than a Life shard restores.
Fjør's Recovery Window: Animation Canceling for Faster Healing
Fjør's healing animation locks you in place for 1.2 seconds, but you can cancel the recovery frames by dodging at the 0.8-second mark. This tech, discovered during the demo's playtest (422 feedback forms collected), lets you heal mid-combat without eating a full enemy combo. The window is tight—inputting the dodge too early cancels the heal entirely, wasting the Life shard. Practice on the prologue's first invader encounter, where the enemy's 1.5-second windup gives you a safe rehearsal window. Master this cancel and you can effectively heal during boss fights that previously forced you to retreat to safe zones.
The first thing to understand about Divinum how to heal is that you have exactly three reliable recovery methods in the demo, and each one serves a different purpose. The Life Shard system works as your primary consumable, the Sanctite currency lets you purchase refills at checkpoints, and the Impale skill provides a risky but powerful self-heal option when you unlock it. Knowing which method fits each situation is the difference between smooth progression and repeated deaths.
| Healing Method | Source | Cooldown | Best Use Case |
|---|---|---|---|
| Life Shards | Found in hidden rooms, dropped by elites | Instant use | Emergency recovery mid-combat |
| Sanctite Refills | Purchased at checkpoints | Per-restock | Sustained exploration between areas |
| Impale Skill | Skill trial reward | 8 seconds | Aggressive recovery while dealing damage |
Your Life Shard inventory carries over between checkpoints, but the maximum you can hold is capped at five in the demo. This cap forces you to think about when to heal rather than hoarding everything for the boss fight. Community reports from the Steam discussions indicate that players who used shards liberally during exploration actually performed better against the Warden, because they entered the fight with full health and a clear mind. The Sanctite currency, which you collect from defeated enemies and breakable objects, funds your checkpoint refills, so spending it wisely matters more than stockpiling.
Divinum Mana Guide: Managing Your Resource Pool
Life Shard Drop Rates: Where Healing Items Actually Spawn
The demo's prologue area (version 0.39.1) spawns Life shards from breakable crates at roughly a 1-in-6 rate, while fallen Warden enemies drop them at a consistent 1-in-4. This means aggressive play yields more healing than methodical crate-smashing. In the mid-game combat slice, however, Life shard drops shift almost entirely to elite enemies, forcing you to rely on Sanctite-purchased potions between encounters. Prioritize killing the spear-wielding invaders first—they drop shards at double the rate of sword carriers, making them your most reliable healing source during extended fights.
Skill Trial Healing Rewards: The Rune That Changes Recovery
The Skill trial rooms scattered through the prologue reward Runes that directly modify healing mechanics. The Heal Rune, unlocked from the second trial, converts 30% of damage dealt into HP over 3 seconds—a lifesteal effect that fundamentally changes how you approach combat. Unlike Life shards, this Rune works during boss fights with no adds, making it essential for the mid-game combat slice's elite encounters. Pair it with the Dodge Rune, which grants 0.5 seconds of invulnerability after a perfect dodge, and you can sustain through fights that would otherwise require multiple potion purchases.
Your mana bar is the engine that powers every skill in Divinum, and this Divinum mana guide explains why resource management matters more than raw damage output. Each skill costs a specific amount of mana, and your base pool regenerates slowly over time, but the recovery rate is too slow to rely on during extended fights. The Mana Shard system, tracked in the rune menu alongside Life Shards, increases your maximum pool when you collect enough fragments.
| Mana Source | Amount | How to Obtain |
|---|---|---|
| Base Regeneration | 2 per second | Passive, always active |
| Mana Shards | +10 max mana per shard | Hidden rooms, elite drops |
| Sanctite Purchase | Full refill | Checkpoint vendor |
The key insight from the demo is that mana efficiency beats raw skill spam in almost every encounter. The Impale skill, for example, costs 25 mana and heals you for a percentage of damage dealt, which means using it on a single target wastes resources compared to landing it on a group. According to community testing from the demo period, players who balanced their skill usage with basic attacks maintained higher overall DPS than those who drained their mana bars in the first ten seconds of a fight. The Mana Shard locations in the prologue are worth hunting down early, because the extra capacity lets you chain two full skill rotations before needing to disengage.
Divinum How to Level Up: Progression and Stat Growth
The Divinum how to level up system works differently from traditional RPGs, because you gain power primarily through exploration and skill acquisition rather than experience points. The demo uses a Sanctite economy where currency spent at checkpoints unlocks permanent upgrades, and the Skill Trial rooms scattered across the island reward you with new abilities. This design encourages thorough exploration over grinding, which fits the metroidvania structure perfectly.
| Progression Method | Cost | Reward |
|---|---|---|
| Skill Trials | No cost, combat challenge | New skills, including healing options |
| Sanctite Upgrades | 50-200 Sanctite per tier | Increased health, mana, or damage |
| Rune Collection | Found in hidden rooms | Passive modifiers to your build |
Your health bar increases through Sanctite upgrades at the checkpoint vendor, with each tier adding roughly 15% of your base pool. The first upgrade costs 50 Sanctite, which you can accumulate within the first twenty minutes of the prologue if you break every crate and explore every side path. The skill trial system deserves special attention, because these challenge rooms reward you with the Impale skill and other combat abilities that fundamentally change how you approach fights. Our skill trial rewards guide breaks down each challenge room and what you earn from completing them.
Divinum How to Unlock Skills: The Complete Path
Understanding Divinum how to unlock skills requires knowing the difference between trial rewards and checkpoint purchases, because both systems feed into your combat toolkit. The Skill Trial rooms are marked on your map with a distinctive icon, and each one presents a combat challenge that tests your mastery of previously learned mechanics. Completing these trials grants you permanent skills that stay unlocked for the rest of your playthrough.
The Impale skill serves as the most important unlock for healing-focused builds, because it converts damage dealt into health recovery. This skill appears in the second skill trial of the prologue, which pits you against a group of fast-moving enemies that punish panic rolling. Our Impale skill breakdown covers the exact mechanics, including the heal percentage and how it scales with your damage output.
Beyond trials, the checkpoint vendor offers skill upgrades that enhance your existing abilities rather than granting new ones. These upgrades cost Sanctite and typically add effects like increased range, reduced cooldown, or bonus damage against specific enemy types. The skill slot system limits you to four equipped skills at once, which means you need to choose between healing utility and raw damage output. Most players in the demo ran with Impale, a gap closer, an AoE attack, and a defensive option, but your ideal loadout depends on your playstyle.
Divinum New Player Guide: Early Game Priorities
This Divinum new player guide section covers the first hour of the prologue and the priorities that set you up for success. The opening area introduces the core combat loop, but the real learning curve begins when you encounter your first elite enemy. Your first priority should be collecting the Life Shards hidden in the breakable walls near the starting beach, because these give you the buffer needed to survive early mistakes.
| Priority | Action | Why It Matters |
|---|---|---|
| First | Collect all Life Shards in the starting area | Extra health buffer for early fights |
| Second | Complete the first Skill Trial | Unlocks Impale for self-healing |
| Third | Save 50 Sanctite for the first health upgrade | Increases survivability before the Warden |
| Fourth | Explore every side path for Mana Shards | Enables longer skill rotations |
The Warden boss fight at the end of the prologue serves as your graduation exam, testing everything you learned about healing, mana management, and skill usage. Players who rushed through the prologue without collecting upgrades found this fight nearly impossible, while those who explored thoroughly reported clearing it on their first or second attempt. The demo's checkpoint system saves your progress at rest points, but you cannot change your loadout mid-fight, so prepare before you step into the arena.
Advanced Healing Strategies: Maximizing Recovery Efficiency
Once you understand the basics of Divinum how to heal, you can start optimizing your recovery strategy for different encounter types. The Impale skill becomes significantly more powerful when paired with runes that boost your damage output, because the heal scales off damage dealt. A build focused on attack speed and crit chance turns Impale into a reliable sustain tool that keeps you at full health through extended fights.
The hit-and-run approach works well for exploration, where you use Impale on groups of enemies to top off your health without spending Life Shards. Save your shards for boss fights and elite encounters where you cannot afford to trade damage. According to player reports from the Steam community, the optimal ratio is roughly three shards saved for boss encounters and two used during exploration, though this shifts based on your skill level and build.
For the Warden fight specifically, consider equipping skills that provide mobility alongside your healing option. The Warden's attack patterns punish standing still, so you need to weave in dodges between Impale uses. Our skill combo guide covers effective pairings that maintain pressure while keeping you alive, including the Impale-plus-dash combo that veteran players favor.
Frequently Asked Questions
What is the fastest way to heal in Divinum?
The Impale skill provides the fastest healing because it converts damage into health with no consumable cost, but it requires you to land hits. Life Shards offer instant recovery and work in any situation, making them the most reliable option when you need immediate health during boss fights.
How do I increase my maximum health in Divinum?
Spend Sanctite at the checkpoint vendor to purchase health upgrades, with the first tier costing 50 Sanctite and each subsequent tier increasing in price. You can also find hidden Life Shard fragments that permanently increase your health pool when you collect enough of them.
Can I heal outside of combat in Divinum?
Yes, you can use Life Shards anytime, even outside combat, but the game does not offer passive regeneration. The Sanctite refill at checkpoints restores your shard count, so returning to a checkpoint before a difficult area is a smart strategy.
What skills should I unlock first for healing?
Unlock Impale first—it's your only reliable self-heal, converting damage dealt into recovery. Then prioritize attack speed and damage nodes, since every hit feeds Impale's healing. Skip defensive skills early; they delay your damage curve. Pair Impale with a low-cooldown sword skill to sustain health through extended fights.
Is the Divinum demo save compatible with the full game?
According to the official Steam news, saves from previous versions may work, but the developers recommend starting a new save for the extended prologue in version 0.39.1. The full game launches on August 28, 2026, and you can check the official Divinum Steam page for the latest information on save compatibility and launch details.