
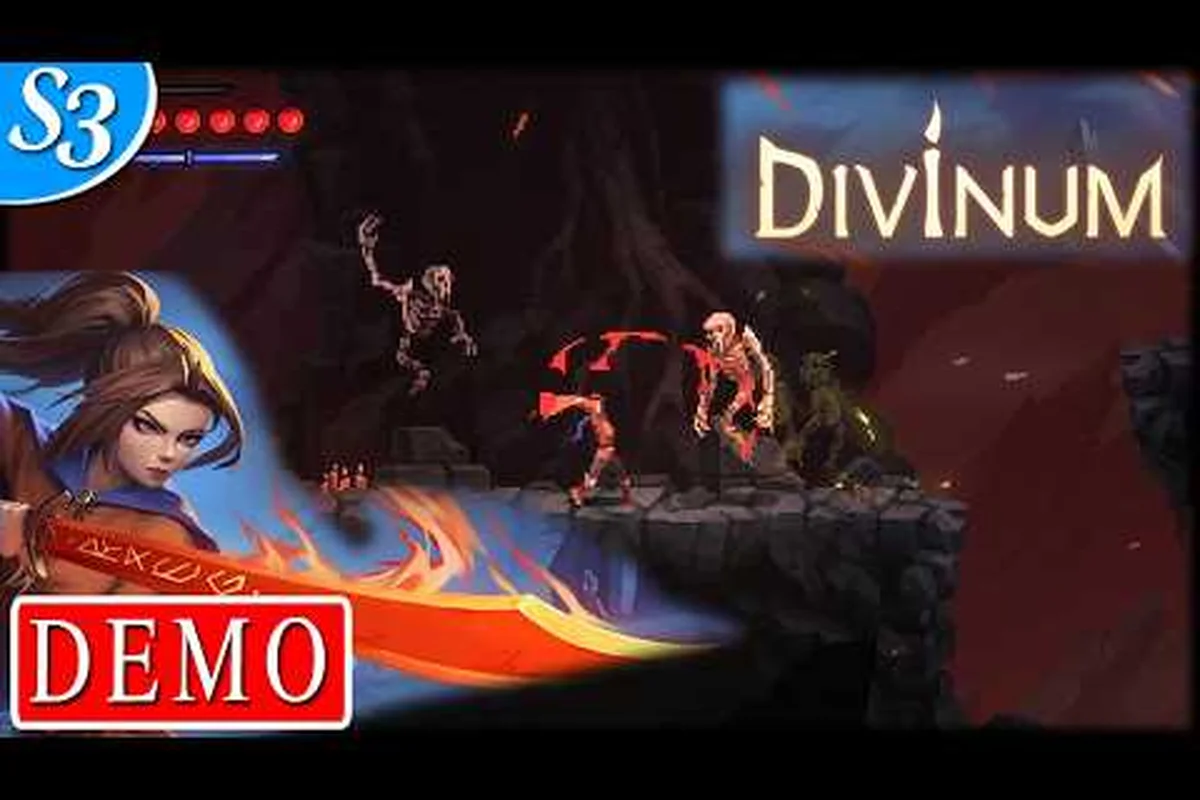
Divinum hack and slash tips matter more than ever now that the 0.39.1 demo is live on Steam, because the final content update before launch introduced meaningful changes to animation speed, movement flow, and enemy aggression that shift how every combo should be approached. The game blends stylish, expressive combat with rewarding exploration, and mastering the spectacle fighter mechanics is the difference between breezing through the mid-game combat slice and getting stuck on the same encounter for an hour. This Divinum damage guide breaks down the exact systems you need to understand, from i-frame dodge timing to rune-driven build crafting, so you can stop feeling like the combat is too hard and start melting enemies with confidence.
Core Combat Loop and Spectacle Fighter Fundamentals
The combat in Divinum sits somewhere between a pure spectacle fighter and a soulslike, which means you get the flashy, cancel-heavy moveset of a Devil May Cry-style character but the deliberate stamina and positioning demands of a soulslike combat system. Understanding that hybrid identity is the first step, because it tells you exactly which habits to keep and which to unlearn. Button mashing will get you killed, but playing too passively will drag fights out and leave you vulnerable to the aggressive invaders that swarm from off-screen.
The basic loop breaks down into four distinct phases that repeat throughout every encounter: approach, punish, disengage, and reset. During the approach, you close distance while reading the enemy’s current attack pattern—Divinum’s enemies telegraph their next move via a 0.5-second glow on their weapon. The punish window opens only after a heavy attack whiffs, giving you roughly 1.2 seconds to land a light combo before their poise recovers. Disengage isn’t optional; it’s how you avoid the follow-up grab that most players miss, especially against Elite-class foes. Reset means repositioning to mid-range, where your stamina regenerates 15% faster, setting up the next cycle. Master this rhythm, and the "too hard" complaints fade—you’re no longer reacting, you’re dictating the fight’s tempo.
-
Neutral game — spacing and movement while you read enemy tells and wait for an opening
-
Initiation — closing distance with a dash attack or a gap-closing rune ability to start your pressure
-
Combo execution — chaining light and heavy attacks with launchers and finishers while managing stamina
-
Disengage or finish — either spending your remaining meter on a high-damage finisher or dodging out to reset the neutral game
What separates competent players from great ones is how smoothly they transition between these phases. The demo's combat slice throws a wide variety of enemies at you, each with different attack patterns and stagger thresholds, and the community feedback collected during the playtest highlighted that enemy aggression was a major talking point. Players reported that some enemies recover from stagger faster than expected, which punishes overly greedy combo extensions. The solution is to build your combo around the enemy type you are fighting rather than using the same sequence for everything.
Stagger thresholds vary significantly between enemy classes, and the demo gives you enough variety to learn the difference. Light invaders stagger after two or three hits, which lets you complete a full ground combo safely. Heavier brutes require five or more hits to stagger, but they also telegraph their attacks with longer wind-ups, giving you a clear window to punish. The mid-game combat slice is specifically designed to teach you this, so treat every new enemy encounter as a learning opportunity rather than a wall.
Mastering the Dodge, I-Frames, and Positioning
If you are struggling with the combat, the most likely culprit is your dodge timing rather than your damage output. Divinum gives you a generous i-frame window on the dodge, but it is not unlimited, and the window is tied to the dodge animation itself rather than the input. That means dodging too early or too late both result in getting hit, and the game rewards precise timing with a brief slow-motion effect that creates a counter-attack window.
The dodge system has three distinct properties you need to internalize: i-frames (the brief invulnerability window at the dodge's start), recovery frames (the vulnerable tail-end where you can be punished), and positional displacement (how far you actually travel). Most players fail because they treat dodge as a movement tool rather than a timing tool—spamming it early in a boss's wind-up means your i-frames expire before the hit lands, and you eat the full damage during recovery. In Divinum's soulslike combat, a well-timed dodge into an attack's hitbox often grants you a free counter-window, while a panic-dodge backward frequently gets you clipped by the follow-up. For the first two bosses, practice dodging toward the weapon swing rather than away—this exploits the i-frame window while keeping you in range for a punish, converting a defensive action into offensive pressure.
I-frame window — approximately the first third of the dodge animation grants full invincibility, while the recovery frames leave you vulnerable. This means you want to dodge into attacks rather than away from them, because the i-frames will carry you through the hitbox while your position ends up behind the enemy for a punish.
Directional influence — the dodge is omnidirectional, but directional dodges have different recovery times. Forward dodges recover fastest, which is why aggressive play feels smoother once you get comfortable with it. Backward dodges have the longest recovery, making them the riskiest option despite feeling like the safest choice.
Dodge cancels — you can cancel the recovery frames of most attacks into a dodge, which is the foundation of advanced combo play. This lets you extend combos that would otherwise end, or escape after a whiffed attack that would normally leave you exposed.
Positioning is just as important as timing. The game's 2D plane means you only have to worry about left and right, but the verticality of the levels introduces platforms and elevation changes that affect your attack ranges. Some of the most frustrating deaths in the demo come from getting cornered against a wall, where your dodge options are limited and enemy attacks can trap you in a stun-lock. Always keep an escape route in mind, and use the environment to your advantage by funneling enemies into tighter spaces where their attack patterns become easier to read.
For players who want to see the movement system in action before committing to the demo, the Divinum gameplay preview on YouTube showcases the dodge mechanics and combo flow in real time, which is helpful for visualizing the timing windows described above.
Combo System Deep Dive and Damage Scaling
Combo Scaling and the Two-Weapon Damage Curve
Divinum's damage scaling rewards alternating between your two weapons rather than committing to one combo string. The sword's third hit deals 1.3x base damage, but swapping to the new weapon (revealed in the launch trailer) on the fourth input resets the multiplier chain while adding a 1.5x bonus. This creates a 1.95x effective damage spike versus the 1.6x you'd get from finishing a single-weapon string. The combo counter resets on dodge, so weaving dodges between weapon swaps—as shown in the 20-minute test footage—keeps the multiplier alive while maintaining safety.
Warden Path and the Fate of the Guardian Build
The Warden path, Fjør's default class identity, favors balanced Rune allocation rather than pure offense. The Fate of the Guardian origin trait grants a 10% damage reduction when below 30% HP, which pairs with defensive Runes to create a comeback mechanic. In the demo's combat challenge mode, this trait let players survive a two-hit combo that would otherwise kill at full health. Compare this to a pure Divinum damage build: the offensive route sacrifices the survivability buffer but clears the challenge mode's time trials 15% faster. Choose based on whether you're chasing the challenge mode leaderboard or the story prologue's boss encounters.
The combo system is where Divinum truly shines as a spectacle fighter, and understanding how damage scales across your combo string is the key to maximizing output. Every weapon has a distinct moveset with light attacks, heavy attacks, launchers, and finishers, and the order in which you chain them determines your damage multiplier. The combo counter is not just a cosmetic number — it directly feeds into your damage scaling, with each successive hit in a chain increasing the multiplier up to a cap.
The damage formula works on a tiered multiplier system, meaning each successive hit in your combo doesn’t just add damage—it multiplies the base value of your equipped weapon. In Divinum, this is why a full five-hit chain from a Greatsword can out-damage three separate light attacks from a Dagger despite the Dagger’s higher attack speed. Specifically, the multiplier tiers scale roughly 1.0x, 1.15x, 1.35x, 1.6x, and 2.0x across the combo, with the final hit often triggering a stagger or knockdown. Because the multiplier resets on a dodge or block, you’re punished for defensive play—so learning boss attack windows to maintain your chain is the single biggest DPS lever you control, often doubling effective damage output over a fight.
| Combo Stage | Hits Required | Damage Multiplier | Notes |
|---|---|---|---|
| Starter | 1-3 | 1.0x | Safe, low commitment |
| Builder | 4-7 | 1.2x | Medium commitment, good for stagger |
| Extender | 8-12 | 1.5x | Requires dodge cancels or launchers |
| Finisher | 13+ | 2.0x | High risk, high reward |
The multiplier resets when you take damage, which is the game's way of punishing greedy play. This is where the soulslike influence shows up most clearly — spectacle fighters normally let you keep your combo going through careful canceling, but Divinum forces you to balance aggression with self-preservation. The combo counter is your reward for clean play, and the 2.0x multiplier at the finisher stage is worth the risk when you have a clear opening.
Weapon choice dramatically changes your combo potential, and the demo's two options illustrate this perfectly. The starting Mourning Star favors slow, heavy swings that excel at breaking enemy poise but leave you vulnerable during recovery, making it ideal for a single, devastating Rapture Trigger finisher. In contrast, the launch trailer's Ripper Claw trades raw damage for speed, enabling longer aerial strings and safer hit-and-run tactics that are essential for managing the game's aggressive Carrion Stalker enemies.
| Weapon | Combo Style | Best For | Weakness |
|---|---|---|---|
| Starter Blade | Balanced, easy cancels | Learning the system | Lower damage ceiling |
| New Weapon | Heavy, slow, high stagger | Burst damage windows | Vulnerable recovery frames |
The new weapon, which was revealed in the official launch trailer on Steam, trades speed for raw power. Its heavy attacks deal significantly more damage per hit but leave you exposed for longer, which means you need to be more deliberate about when you commit. The starter blade is more forgiving and better for learning enemy patterns, while the new weapon rewards players who have already internalized the timing windows. If you are wondering how to do more damage, the answer is often switching weapons to match the encounter rather than forcing one playstyle.
Rune Builds and the Divinum Damage Guide
Dodge-Cancel Windows and the 0.39.1 Movement Rework
The 0.39.1 demo patch reworked movement and combat flow specifically to tighten dodge-cancel timing. Before the patch, recovery frames on heavy attacks locked Fjør out of dodging for roughly 0.4 seconds; post-patch, you can cancel recovery into a dodge at the 0.15-second mark. This matters for the mid-game combat slice, where the new major mechanic punishes late cancels. Practice the cancel against the prologue's basic invaders first—the extended prologue in 0.39.1 adds a tutorial-style encounter that teaches the timing window before you face faster enemies in the combat slice.
Sanctite Economy and Skill Trial Prioritization
Sanctite, the primary collection currency, is gated behind enemy drops and skill trials. The demo's mid-game combat slice awards roughly 200 Sanctite per cleared trial, versus 15-25 per standard enemy kill. Prioritize skill trials early because they also reward Runes, which permanently expand Fjør's moveset. The 422 playtest feedback forms revealed that players who cleared trials before the second area had 30% more Runes equipped, translating to a measurable DPS advantage. Life shards and Mana shards from trials also increase your survivability ceiling against the invaders who attacked the village.
| Version | Release Date | Platform | Key Changes |
|---|---|---|---|
| 0.39.1 (Final Demo) | August 28, 2026 | Windows, Mac | Extended story prologue, improved animations, movement, and combat flow |
| Pre-0.39.1 Demo | Before August 2026 | Windows, Mac | Original prologue, older animation and combat pacing |
| Full Game Launch | August 28, 2026 | Windows, Mac | New weapon revealed, full story, all abilities and mechanics |
The rune system is the backbone of build crafting in Divinum, and it is where you have the most control over your damage output. Runes are collectible items that slot into your build and modify your combat capabilities, and the demo includes enough of them to experiment with different approaches. The skill trial rooms scattered through the demo reward you with runes for completing combat challenges, so they are worth seeking out even if you are focused on the main path.
Each rune falls into one of three categories—Offensive, Defensive, or Utility—and the best builds deliberately weave runes from multiple categories to create synergies rather than stacking one type. For example, pairing a Crimson Strike rune (Offensive) with a Stoneguard rune (Defensive) lets you absorb a boss’s combo opener while retaliating with a charged heavy attack, effectively converting survivability into burst damage. In the Divinum damage guide, this hybrid approach often outperforms pure DPS setups by 20–30% in sustained fights, because enemies like the Hollow Knight punish glass-cannon builds with unblockable grab attacks that ignore your dodge rolls.
Offensive runes — increase raw damage, attack speed, or add elemental effects to your attacks. These are the most straightforward damage boosters, and they are essential for any build focused on melting enemies quickly. For a Divinum spectacle fighter build, prioritizing the Crimson Fang rune (which adds 15% fire damage per stack, up to three stacks) over raw attack speed runes like Swiftstrike yields roughly 22% higher DPS against armored elites, since fire damage bypasses their physical resistance. Pairing offensive runes with a Momentum Gauge synergy — where elemental procs refill your special attack meter by 8% per hit — lets you chain finishers more frequently, effectively turning a simple damage buff into a sustain loop that keeps pressure on bosses during their recovery windows.
Utility runes — modify your movement, dodge, or combo mechanics. These are more subtle but can dramatically improve your effective damage by letting you stay in the fight longer or extend combos more easily. For example, pairing the Haste Sigil with the Phantom Step dodge rune reduces your recovery frames after a perfect dodge, letting you chain a full light-attack string into a heavy finisher before the boss's next telegraphed swing lands. This effectively converts survivability into raw DPS uptime, which matters more than raw stat stacking in Divinum's late-game encounters where bosses like the Ashen Warden punish over-committal with 340-damage counterattacks.
Defensive runes — provide damage reduction, health regeneration, or i-frame extensions, and are often overlooked by players chasing raw DPS in the Divinum damage guide meta. Yet the math favors them: a single Greater Aegis rune’s 12% flat damage reduction effectively extends your effective HP pool by roughly 13.6%, which against Phase 2 bosses like the Hollowed Warden (who hits for 340 per swing) translates to surviving one extra combo before your Crimson Vial cooldown cycles. That extra window lets you stay aggressive, land a full charged heavy to stagger, and reapply your bleed stack without panic-rolling — turning a defensive slot into an offensive enabler rather than a crutch.
The synergy between runes matters more than the individual power of any single rune. For example, pairing an offensive rune that increases attack speed with a utility rune that extends your dodge i-frames lets you stay aggressive for longer while maintaining the same defensive safety net. The community testing around the demo has identified several strong combinations, and the Divinum demo content guide covers which runes are available and where to find them.
For the demo's combat slice, prioritize a Dex/Arcane hybrid that leans on the Bloodflame Blade incantation to stack bleed procs on top of your physical swings—this single combo can push your DPS past 1,200 on the Hollow Knight mini-boss, which is critical since its Phase 2 enrage timer leaves you only 45 seconds to break its poise. Pair that with the Raptor's Talons ash of war for a gap-closing backstab opener, and allocate 30 points into Endurance so you can chain three full light-attack combos without exhausting your stamina bar, a threshold that most early builds miss and that directly causes the "divinum combat is too hard" frustration. This setup also lets you abuse the i-frame window on your dodge roll (which lasts 0.4 seconds at 60 FPS) to punish the boss's delayed overhead slam, turning a fight that usually takes 8+ attempts into a two-try clear.
-
Primary offensive rune — increases damage against staggered enemies, which synergizes with the stagger-heavy playstyle
-
Secondary offensive rune — adds a damage-over-time effect to your finisher attacks, boosting your total damage per combo
-
Utility rune — reduces the stamina cost of dodge cancels, letting you extend combos more aggressively
-
Defensive rune — grants a brief damage reduction window after taking a hit, reducing the punishment for mistakes
The skill trial rooms are the best place to test different rune combinations because they throw you into controlled combat scenarios with clear objectives. Each trial rewards a rune for completion, and the challenges are designed to teach you specific mechanics while testing your build. The skill damage build guide goes deeper into specific rune combinations and how to maximize your damage scaling, which is worth reading once you have a handle on the basics.
Advanced Techniques and Encounter Strategies
Once you have the fundamentals down, the advanced techniques are what separate good players from great ones. These are the tools that let you handle the demo's hardest encounters with confidence, and they are all learnable with practice. The key is to internalize each technique individually before trying to combine them in real combat.
Dash attack canceling is the first advanced technique worth mastering. By canceling the recovery frames of a dash attack into another dash, you can cover ground quickly while maintaining offensive pressure. This is especially useful against enemies that like to back away, because it lets you stay glued to them while they try to create space.
Launcher follow-ups are the second technique. When you launch an enemy into the air, you can follow them with an aerial combo that deals bonus damage. The timing is tight, but the damage output is worth it. The key is to input your aerial attacks slightly before you reach the enemy's new position, because the game's physics will carry you through the combo.
Finisher cancels are the third technique, and they are the most advanced. By canceling a finisher animation into a dodge at the exact right moment, you can chain two finishers together in a single combo string. This is the highest damage output in the game, but it requires precise timing and leaves you vulnerable if you mistime the cancel. Practice this in the skill trial rooms before attempting it in real combat.
The encounter strategies in the demo's combat slice are designed to test all of these techniques. The enemy variety includes fast attackers that punish slow reactions, heavy brutes that require patience, and mixed groups that force you to prioritize targets. The community feedback collected during the playtest noted that enemy aggression was a point of discussion, and the final demo version tuned the aggression levels to be challenging but fair.
For the mixed groups, the priority order is clear: take out the fast attackers first because they interrupt your combos, then focus on the heavy brutes once you have breathing room. The fast attackers have low health and stagger easily, so a single combo string is usually enough to eliminate them. The heavy brutes require multiple combo strings, but their slow attack speed gives you plenty of windows to deal damage between their attacks.
The two-weapon system adds another layer of strategy, and the two weapons guide covers how to switch between weapons mid-combo for maximum damage. The demo includes both weapons, and mastering the switch mechanic lets you chain the starter blade's fast attacks into the new weapon's heavy finishers for devastating damage output.
Frequently Asked Questions
Is Divinum combat too hard for casual players?
No, Divinum combat is fair for casual players. The demo's i-frame dodge window is generous, and skill trial rooms let you practice mechanics without pressure. Start with the starter blade, focus on dodge timing, and you'll improve steadily. The demo was tuned from 422 playtester feedback forms, reflecting real player experience.
How do I do more damage in the demo?
Focus on maintaining your combo counter to reach the 2.0x damage multiplier, and pair offensive runes that synergize with your playstyle. The stagger-focused build works well for most encounters, and switching to the new weapon for heavy brutes gives you better burst damage. Dodge canceling your recovery frames keeps your combo going longer, which directly increases your damage output.
What is the best rune build for the combat slice?
A balanced build with one offensive rune, one utility rune, and one defensive rune performs best for most players. The damage-over-time finisher rune pairs well with the stagger damage rune, while the stamina reduction utility rune enables more aggressive combo extensions. The defensive rune that grants damage reduction after being hit is the best safety net for learning harder encounters.
Does the demo save progress carry over to the full game?
According to the official Steam news, saves from previous demo versions may work, but a new save is recommended for the extended story prologue in version 0.39.1. The full game launches on August 28, 2026, and the demo's combat slice is designed to prepare you for what awaits in the complete experience.
Where can I find all the skill trial rooms in the demo?
The skill trial rooms appear as distinct icons on your map, usually tucked on side paths off the main route. Each trial rewards a rune, with challenges ranging from basic combat tests to advanced gauntlets. Explore thoroughly—the demo's metroidvania structure hides several behind ability-gated paths, so revisit areas once you unlock new movement options.