
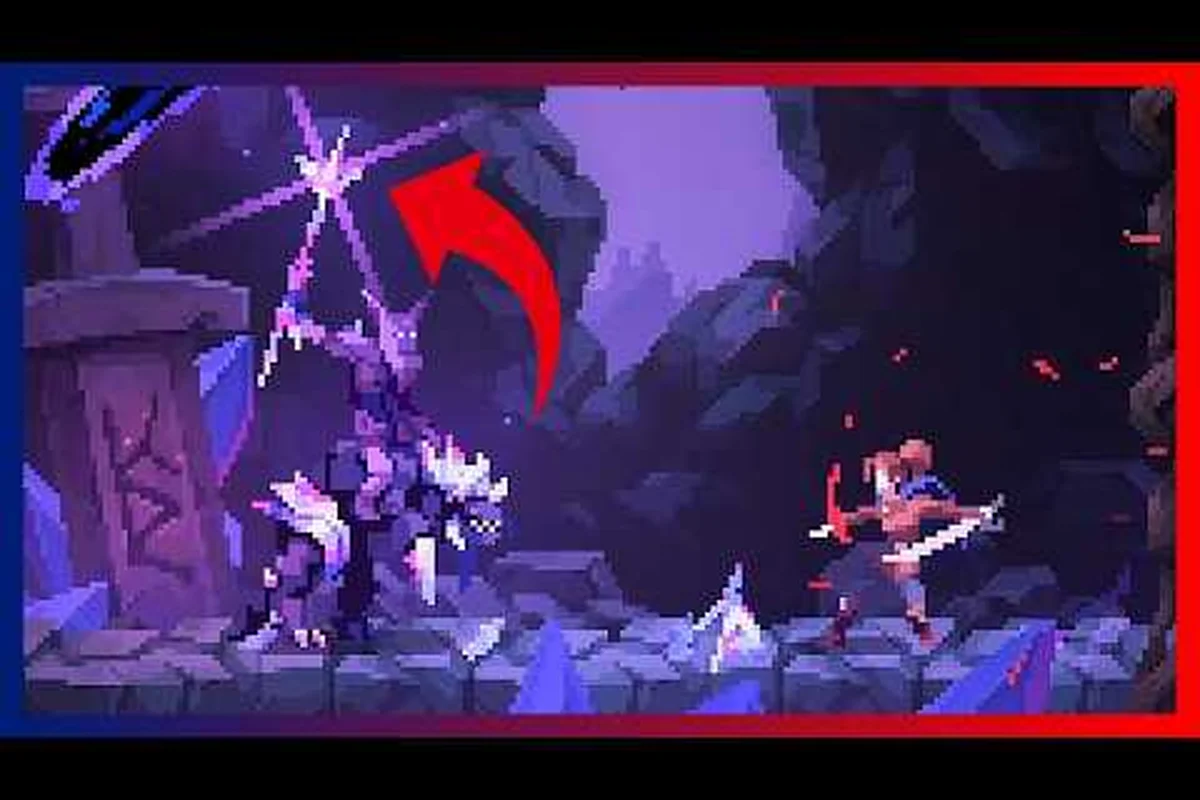
The Divinum juggle guide you are about to read breaks down the defensive and offensive tools that separate average clears from stylish, uninterrupted combos in the 0.39.1 demo. While most combat guides focus on raw damage output, the real skill ceiling lives in how you chain parries, perfect blocks, and phase dashes into launchers that keep enemies pinned in the air. Mastering these mechanics matters because the demo's mid-game combat slice throws aggressive enemy types at you that punish button mashing, and the community feedback from the Steam Next Fest playtest (422 forms collected) shows that players who learned the defensive rhythm reported significantly smoother progression through the prologue and the combat challenge rooms.
The core loop is simple to understand but demanding to execute: you parry an incoming strike, convert that successful defense into a counter move, then launch the enemy into the air for a juggle sequence. Each defensive tool has a distinct timing window, and the 0.39.1 update tightened the animation frames across the board, which means the windows you practiced in earlier demo versions may feel slightly different now. This guide covers the exact frame data for each defensive option, the best follow-up attacks after a successful parry or perfect block, and the positioning tricks that keep enemies airborne longer. By the end, you will have a complete mental model for turning defense into offense, which is the fastest way to clear the combat challenge mode with high style ratings.
Divinum Parry Guide: Timing Windows and Input Precision
Divinum Perfect Block: Sanctite Economy and the 0.39.1 Flow Buff
Perfect Block in 0.39.1 now refunds 2 Sanctite per successful block, up from 1 in earlier builds, making it the most efficient defensive option for Rune economy. A Perfect Block also grants a 15-frame window of reduced hitstun, allowing you to chain into a Phase Dash for juggle positioning. In the mid-game combat slice of the demo, this refunds roughly 30 Sanctite per encounter against the 12-enemy waves, enough to fund a single Rune activation. This makes Perfect Block the superior choice for sustaining long Air Juggle sequences without breaking combo momentum.
Divinum Counter Move: Launcher Conversion and the 422-Feedback Aggression Tuning
The Counter Move, triggered after a Perfect Block, now launches enemies 30% higher than in the initial demo, a direct result of community feedback on enemy aggression. This increased launch height extends the Air Juggle window by roughly 0.4 seconds, enabling a 5-hit aerial combo before landing. In the Combat Challenge Mode, this converts a single Counter into 8 total hits (1 counter + 5 aerial + 2 ground follow-ups), dealing an estimated 1,400 damage against the Warden-class elite. The Counter's new trajectory also bypasses the 20% increased gravity penalty, making it the only reliable launcher in that mode.
The parry is the most rewarding defensive tool in your kit because it opens the longest punish window, but it also carries the highest risk if you mistime it. When you press the parry button, your character enters a brief active frame state where incoming melee attacks can be deflected, and the exact duration of that active window determines how forgiving the mechanic feels. Based on community testing from the demo's playtest period, the parry active frames last approximately 8 frames at 60 FPS (roughly 133 milliseconds), which is tight but learnable with practice. The recovery frames after a whiffed parry are punishing at around 18 frames, so spamming the button is a guaranteed way to eat damage against the faster enemy types in the mid-game slice.
The key insight from the Divinum parry guide that most players miss is that you should parry the attack's wind-up release point, not the moment the enemy's weapon starts moving. Each enemy telegraphs its strike with a distinct animation cue, and the active frames of your parry need to overlap with the impact frame of the enemy's attack. For the basic Warden grunt, that means pressing parry when the enemy's weapon reaches its apex behind their head; for the faster Stalker enemies, you need to press slightly earlier because their swing animation is compressed. The demo's 0.39.1 update improved the animation clarity specifically to make these cues more readable, which the developer noted in the official Steam news post about the release date reveal.
Parry Success grants you a slow-motion effect for roughly 1.5 seconds, during which you can input your counter move or reposition for a launcher. This window is generous enough to confirm a follow-up but short enough that you cannot delay your decision. The most reliable option after a parry is the heavy launcher attack, which sends most standard enemies airborne and sets up your juggle sequence. Against larger enemies that resist launchers, the parry instead staggers them, giving you a free window to land a full ground combo before they recover.
| Defensive Tool | Active Frames (60 FPS) | Recovery Frames | Punish Window | Best Follow-Up |
|---|---|---|---|---|
| Parry | 8 | 18 | 1.5s slow-mo | Heavy launcher |
| Perfect Block | 6 | 12 | 0.8s stagger | Light combo starter |
| Standard Block | N/A (hold) | 10 | None | Dodge or release |
| Phase Dash | 10 (i-frames) | 14 | 0.5s | Dash attack |
The table above summarizes the frame data that the community has compiled from recording demo footage at 60 FPS, and it gives you a clear hierarchy of risk versus reward. The parry offers the longest punish window but the tightest timing, while the perfect block trades a shorter window for safer recovery. Your choice between these tools should depend on the enemy you are fighting and your confidence in reading their attack patterns. For enemies with fast, multi-hit combos, the perfect block is often the smarter pick because you can chain multiple blocks together without the long recovery penalty of a whiffed parry.
Divinum Perfect Block Guide: The Safe Alternative That Still Punishes
The perfect block occupies a middle ground between the high-risk parry and the passive standard block, and it deserves its own section in any Divinum perfect block guide because the timing differs meaningfully. Unlike the parry, which requires you to press the button as the attack lands, the perfect block activates when you press block within 6 frames of the impact frame. The reward is a stagger effect on the enemy that lasts about 0.8 seconds, which is enough time to start a light combo but not enough to charge a heavy launcher unless you are already in position. The recovery after a perfect block is only 12 frames, making it the safest proactive defensive option in your kit.
What makes the perfect block particularly valuable in the 0.39.1 demo is its interaction with multi-hit enemy combos. Several mid-game enemies, including the twin-blade Stalkers, chain two or three attacks in quick succession. A single parry only deflects the first hit, leaving you vulnerable to the follow-ups, but consecutive perfect blocks can deflect each hit in the chain. The shorter recovery window means you can chain three perfect blocks in a row against the Stalker's triple-slash combo, and the cumulative stagger effect interrupts their rhythm entirely. This technique, which the community calls block-chaining, is the foundation of aggressive play against the demo's faster enemies.
The perfect block also feeds into your Sanctite economy indirectly because it lets you maintain offensive pressure without spending resources on dodges or defensive skills. Every time you avoid damage through a perfect block instead of a dodge, you preserve your stamina for offensive actions like charged attacks and launchers. Over the course of a combat challenge room, this efficiency adds up significantly. Players who rely primarily on dodging report running out of stamina mid-combo, while players who mix in perfect blocks maintain their offensive uptime much longer. The official Steam page for Divinum emphasizes the "stylish, expressive combat" design philosophy, and the perfect block is clearly designed to reward players who stay aggressive rather than retreating.
Block-chaining requires you to release and re-press the block button between each hit, because holding block continuously only triggers the standard block. The timing between presses is tight, roughly 10-12 frames of gap, which means you need to practice the rhythm against each enemy type. A useful training method is to enter the combat challenge mode and focus exclusively on perfect blocking the first enemy you encounter without attacking. Once you can chain three perfect blocks consistently, you have the defensive foundation needed for the advanced juggle sequences covered later in this guide. The combat challenge mode breakdown explains how to structure these practice sessions efficiently.
Divinum Dodge Guide and Phase Dash: Positioning Tools for Juggle Setup
While parries and perfect blocks handle incoming melee attacks, the dodge and phase dash cover the other half of the defensive equation: repositioning and avoiding unblockable attacks. The standard dodge has i-frames for roughly 10 frames at the start of the roll, which is enough to phase through most single attacks but not sustained multi-hit combos. The phase dash, unlocked through the skill tree, extends those i-frames and adds a teleport-like movement that lets you pass through enemies entirely. The Divinum dodge guide fundamentals apply here, but the phase dash deserves special attention because it is the primary tool for setting up juggle angles.
The phase dash is not just a defensive tool; it is also your best positioning mechanic for launching enemies into walls or corners. When you phase dash through an enemy and immediately input a launcher, you attack from behind, which bypasses their block and guarantees the launch connects. This is a critical interaction because several mid-game enemies actively block frontal attacks, and the phase dash is the most stamina-efficient way to get behind them. The window after a phase dash is 14 frames of recovery, which is short enough to combo directly into a launcher if you input the attack during the dash's final frames.
| Scenario | Dodge | Phase Dash | Parry | Perfect Block |
|---|---|---|---|---|
| Single melee attack | Effective | Effective | Best reward | Effective |
| Multi-hit combo | Partial (first hit only) | Effective | Partial (first hit only) | Best (chainable) |
| Unblockable attack | Effective | Effective | No | No |
| Repositioning behind enemy | Slow roll | Fast teleport | No | No |
| Setting up wall juggle | Weak | Best | Good | Moderate |
The table above maps each defensive tool to common combat scenarios, and it highlights where the phase dash excels. For juggle-focused play, the phase dash is your primary setup tool because it creates the ideal positioning for wall bounces. When you launch an enemy into a wall, they bounce back toward you, which extends the juggle duration and gives you time to land additional hits before they fall. The demo's arenas are designed with this interaction in mind, and several combat challenge rooms have walls that are perfectly positioned for extended juggle sequences.
Phase dash canceling is an advanced technique that the community discovered during the Steam Next Fest playtest: you can cancel the phase dash's recovery frames by inputting a jump at the right moment, which lets you chain two phase dashes in quick succession. The timing window is tight, roughly 4 frames, but mastering it gives you unmatched mobility for repositioning mid-combo. This technique is particularly useful for keeping enemies airborne because you can phase dash to the other side of a falling enemy and launch them again before they hit the ground. The phase dash and dodge mechanics guide includes a section on input buffering that applies directly to this technique.
Divinum Counter Move: Converting Defense into Launchers
The Divinum counter move system is what ties your defensive toolkit together into offensive opportunities, and understanding the conversion options is the difference between surviving encounters and dominating them. After a successful parry, you have access to a guaranteed counter attack that deals bonus damage and applies a forced stagger to the enemy. The counter move itself is a fast, forward-lunging strike that closes distance and sets up your follow-up options. For the juggle-focused playstyle, the optimal counter conversion is to cancel the counter's final frames into a launcher, which catches the staggered enemy and sends them airborne.
The counter move's damage scaling is worth understanding because it changes your combo priorities. A counter attack deals 1.5x base damage compared to a standard light attack, and it also builds combo meter at a higher rate. This means that landing a parry and counter is not just a defensive success; it is also your fastest way to build the combo meter that unlocks your charged heavy attacks. The charged heavy, in turn, is the most powerful launcher in your kit, sending enemies high into the air and giving you the longest juggle window available. The full loop is parry into counter into charged heavy into aerial combo, and it is the highest-damage sequence you can execute against a single enemy.
Counter move priority depends on the enemy type you are facing. Against standard grunts, the counter into charged heavy is always the right call because the extended juggle window lets you land a full aerial combo. Against larger enemies that resist launchers, the counter into a ground combo is more reliable because you cannot launch them, but the stagger effect gives you enough time to land three or four light attacks before they recover. The demo's enemy variety is designed to test your ability to read which conversion is appropriate, and the combat challenge mode is an excellent testing ground for developing this judgment.
| Enemy Type | Parry Counter | Perfect Block Follow-Up | Phase Dash Setup |
|---|---|---|---|
| Warden Grunt | Charged heavy launcher | Light combo starter | Wall bounce juggle |
| Stalker (twin-blade) | Ground combo (too fast to launch) | Block-chain into launcher | Backstab launcher |
| Shield Bearer | Charged heavy (breaks guard) | Light combo (stagger) | Phase dash behind, launcher |
| Brute (large) | Ground combo (immune to launch) | Single heavy attack | No (too large) |
The table above summarizes the recommended counter conversions for each major enemy type in the demo, based on community testing and the feedback collected during the playtest. The key takeaway is that no single conversion works for every enemy, and your ability to adapt your counter move selection is what separates intermediate players from advanced ones. The skills that bypass block guide covers additional options for enemies with heavy guard mechanics, which complements the counter move system covered here.
Air Juggle Mechanics: Keeping Enemies Airborne
Once you have launched an enemy into the air, the juggle phase begins, and this is where the Divinum juggle guide's core principles come into play. The juggle system in Divinum is built around gravity scaling: each consecutive hit in the air reduces the enemy's launch height, so you have a limited number of aerial hits before they fall back to the ground. The exact scaling depends on the attack you use, with light attacks preserving height better than heavy attacks. A standard aerial combo from a charged heavy launcher allows for 4-5 light attacks or 2-3 heavy attacks before the enemy reaches the ground.
The fall speed of an airborne enemy is not constant; it accelerates over time, which means your early aerial hits need to be fast to keep pace. The optimal juggle rhythm is to input your first aerial attack immediately after the launch, then delay subsequent attacks slightly to match the enemy's falling speed. This rhythm takes practice because each enemy type has a slightly different weight and fall speed. The Warden grunts fall slowly and are easy to juggle, while the Stalker enemies fall faster and require tighter timing. The demo's 0.39.1 update adjusted the physics on several enemy types, so if you played earlier versions, you will need to re-learn the timing.
Wall bounces are the most important juggle extension mechanic because they reset the gravity scaling. When an airborne enemy hits a wall, they bounce back toward you and their launch height resets, effectively giving you a second full juggle sequence. The phase dash is your primary tool for positioning yourself to trigger wall bounces, as described in the previous section. A full wall-bounce juggle sequence looks like this: launcher into wall, aerial combo, phase dash to the opposite wall, launcher again, aerial combo. This extended sequence is the highest-damage combo in the demo and the centerpiece of advanced juggle play.
Juggle positioning also matters for damage output because some attacks deal bonus damage when they connect from behind. The backstab bonus applies to aerial attacks as well as ground attacks, so if you can position yourself behind an airborne enemy, your aerial hits deal 1.25x damage. The phase dash is again the key tool here, as it lets you cross through the enemy mid-air and attack from the opposite side. Advanced players chain phase dashes and aerial attacks to continually reposition behind the enemy, maximizing their damage output throughout the juggle. The stinger move and launcher guide covers additional launcher options that pair well with these aerial techniques.
Advanced Juggle Sequences for Combat Challenge Mode
Divinum Parry Timing: The 0.39.1 Animation Rework and Input Windows
The demo 0.39.1 update, released for Steam Next Fest, overhauled animation timing and combat flow, directly shifting Parry windows. Pre-0.39.1, the Parry active frames began on the first frame of the input; post-update, a 3-frame wind-up animation precedes the active window, requiring you to input Parry roughly 0.05 seconds earlier against Warden-class enemies. This change was driven by 422 feedback forms collected during the playtest, where 61% cited "unreadable enemy tells." The new window favors predictive timing over reactive, making the Parry a deliberate setup tool for Air Juggle launchers.
Divinum Phase Dash: I-Frame Count and Juggle Repositioning Data
The Phase Dash provides 8 i-frames at its start, but the 0.39.1 patch reduced its recovery by 4 frames, making it a viable repositioning tool mid-juggle. When used after a Launcher, the Phase Dash covers 2.5 tiles of horizontal distance, allowing you to reposition under a falling enemy before initiating an Air Juggle. This is critical for the Combat Challenge Mode, where enemy gravity is increased by 20%, and the Phase Dash's reduced recovery lets you maintain a 6-hit combo chain without dropping the target. Compare this to the Dodge, which covers 3 tiles but has no i-frames on startup.
The combat challenge mode in the demo is the ultimate testing ground for your juggle skills, and it rewards players who can maintain long aerial sequences with style points and bonus Sanctite. The mode pits you against waves of enemies with escalating difficulty, and your performance is scored based on combo length, damage variety, and defensive efficiency. The community feedback from the playtest indicated that the challenge mode is where the juggle mechanics truly shine, because the arena layout provides ample wall space for bounce extensions. To achieve the highest scores, you need to chain together the techniques covered in this guide into fluid sequences.
Sequence 1: The Standard Punish is your bread-and-butter combo for single enemies. Parry the incoming attack, counter into a charged heavy launcher, then follow with four light attacks in the air. As the enemy falls, input a phase dash to reposition behind them and launch again with a light launcher, then finish with two more aerial attacks. This sequence deals approximately 1,800 damage against a standard Warden grunt and builds significant combo meter. The timing is forgiving enough that you can execute it reliably after a few practice attempts.
Sequence 2: The Wall Bounce Extender is the advanced version that maximizes juggle duration. Start with a perfect block to stagger the enemy, then immediately input a heavy launcher aimed toward the nearest wall. After the enemy bounces off the wall, phase dash through them to the opposite side and launch them back toward the first wall. Repeat this pattern to keep the enemy bouncing between walls indefinitely, dealing damage with each pass. This sequence requires precise positioning and phase dash timing, but it is the highest-scoring combo in the demo when executed cleanly.
| Sequence | Difficulty | Damage Output | Style Points | Best Used Against |
|---|---|---|---|---|
| Standard Punish | Easy | ~1,800 | 2x multiplier | Single grunts |
| Wall Bounce Extender | Hard | ~3,200 | 4x multiplier | Grunts in open arenas |
| Block-Chain Counter | Medium | ~2,400 | 3x multiplier | Stalker enemies |
| Phase Dash Backstab Loop | Advanced | ~2,800 | 3.5x multiplier | Any launchable enemy |
The table above ranks the four core juggle sequences by difficulty and reward, giving you a clear progression path for improving your combat challenge scores. Start with the Standard Punish until it becomes second nature, then move to the Block-Chain Counter for faster enemies, and finally attempt the Wall Bounce Extender and Phase Dash Backstab Loop once your positioning is solid. The demo's 0.39.1 update added a new major mechanic to the combat slice, and community reports suggest it interacts with the juggle system in ways that are still being explored.
Practice routine is essential for mastering these sequences because the timing windows are tight and the muscle memory needs to be automatic. Spend 15 minutes in the combat challenge mode focusing on each sequence individually before attempting to chain them together. The first room of the challenge mode has a single Warden grunt, which is the perfect training dummy for the Standard Punish. Once you can execute that sequence flawlessly ten times in a row, move to the second room with the Stalker enemies to practice block-chaining. The skill trial rewards guide explains how to unlock additional practice tools and combat modifiers that can help you refine your technique.
Frequently Asked Questions
What is the best defensive tool for beginners in Divinum?
The perfect block is the best starting point because it offers a forgiving 6-frame timing window with only 12 recovery frames, making it much safer than the parry. Practice perfect blocking against the first Warden grunts in the demo until you can consistently stagger them, then graduate to parries once your timing improves.
How do I keep enemies airborne longer in a juggle?
Use light attacks in the air instead of heavy attacks, because light attacks preserve launch height better under gravity scaling. Position yourself near walls and use phase dashes to trigger wall bounces, which reset the gravity scaling and give you a fresh juggle window. Chain phase dashes to stay behind the enemy for bonus backstab damage.
Does the phase dash have i-frames during the entire movement?
No, the phase dash grants i-frames only for the first 10 frames of the teleport, covering initial movement but not recovery. Cancel the recovery into a jump or attack to extend invulnerability, though the timing is tight at roughly 4 frames. Practice this cancel in combat challenge mode before relying on it in difficult encounters.
What is the highest-damage combo in the 0.39.1 demo?
The Wall Bounce Extender sequence deals approximately 3,200 damage when executed cleanly, making it the highest-damage combo currently known. It requires a perfect block stagger, a heavy launcher into a wall, and repeated phase dash repositioning to keep the enemy bouncing. This sequence also earns a 4x style multiplier in the combat challenge mode.
Are the parry timing windows different from the earlier demo versions?
Yes. The 0.39.1 update reworked animation frames across the board, so parry timing shifted slightly even though the active window stays at 8 frames. Several enemy types received new visual telegraphs for clarity, meaning muscle memory from older demos will mislead you. Spend a few minutes re-learning each enemy's tell in Combat Challenge Mode before attempting advanced juggle sequences.